-
Exhaust
- Back
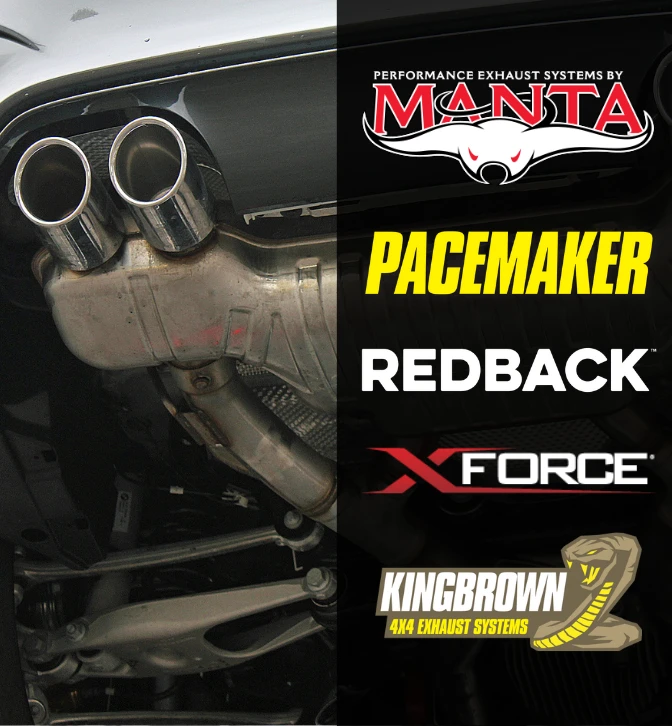
- Performance Exhaust Systems
- Standard Replacement Exhaust Systems
- Exhaust Accessories
- Catalytic Converters
- DPF Filters
- Exhaust Extractors / Headers
- Universal Mufflers & Hotdog Mufflers
- All Exhaust Products
![Exhaust]()
- Suspension
- Towing
- Performance
- Filters
-
Truck
- Back
- Clamps
- Exhaust Tube
- Mandrel Bends
- Raincaps
- Reducers
- Couplers
- Universal Mufflers
- Direct Fit Mufflers
- Flex Bellows
- Heat Protection
- Chrome Stacks
- All Truck Products
![Truck]()
- On Sale
- About Us
- Blog
- Contact Us
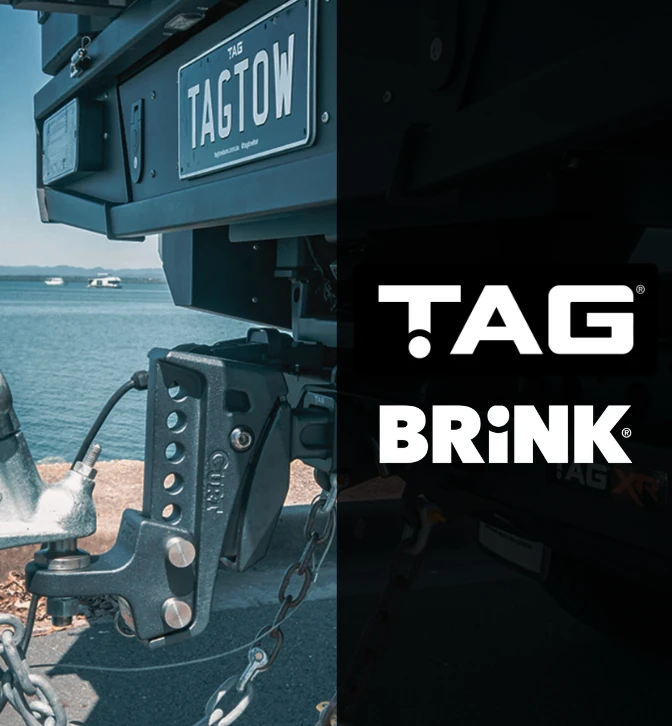

DIY Guide: Installing a Towbar on Your Car
Date Posted: 4 March 2024

When it comes to enhancing your vehicle's capabilities, installing a towbar can be a game-changer for any car enthusiast. Installing a towbar involves several steps, from assessing your towing requirements and selecting the right towbar to gathering the necessary tools and equipment.
It's essential to understand your car's structure, prioritise safety precautions, and follow each step meticulously for a successful installation. So, to help you along, this step-by-step DIY towbar installation blog will delve into all the things you should consider before installing a towbar and then take you through the process.
Preparing for Installation
Before diving into the installation process, it's crucial to adequately prepare. This involves assessing your towing requirements, selecting the right towbar for your car, and gathering all the necessary tools and equipment. Assess your towing requirements based on the weight and type of loads you'll be towing. Consider factors such as towing capacity, hitch type, and installation method to ensure compatibility with your vehicle.
Once you've determined your towing needs, research different towbar options compatible with your vehicle's make and model. Choose a towbar that meets your requirements in terms of towing capacity, hitch type, and compatibility with your vehicle's structure.
Additionally, you can make the job easier by gathering all the tools and equipment required for the installation before getting started. This may include wrenches, screwdrivers, a jack, safety gear such as gloves and goggles, and of course, the towbar kit itself.
Understanding Your Car's Structure
Understanding the structure of your vehicle is fundamental to a successful towbar installation. This involves identifying suitable mounting points, checking the vehicle's towing capacity, and familiarizing yourself with the towbar kit components.
Identify suitable mounting points on your vehicle by referring to the manual or consulting with a professional. Ensure these points are structurally sound and capable of supporting the weight of the towbar and any loads it will be towing. Check your vehicle's towing capacity to ensure it aligns with the load you intend to tow.
Exceeding the towing capacity can strain your vehicle's engine and brakes, compromising safety and performance. Also, familiarise yourself with the components included in the towbar kit before installation. This typically includes the towbar itself, mounting brackets, bolts, and any additional hardware required for installation.
Safety Precautions
Safety should always be the top priority when working on your vehicle. Properly jack up your vehicle using a sturdy jack and jack stands to support the weight securely. Position the jack according to your vehicle's recommended jacking points to avoid damaging the frame or components.
Before starting the installation, don appropriate safety gear such as gloves and goggles to protect yourself from potential hazards. Working under a vehicle or with power tools poses risks that can be mitigated by wearing the proper safety equipment. Throughout the installation process, prioritize safety by working methodically and attentively.
Most importantly, avoid rushing through steps and double-check all connections and fastenings to ensure they are secure before proceeding.
Removing the Rear Bumper and Trims
Now we get to the more practical installation steps. Before installing the towbar, you'll need to remove the rear bumper and any trim panels or accessories obstructing access to the mounting points. This involves detaching the rear bumper, removing trim panels, and preparing the vehicle for towbar installation.
Detach the rear bumper by locating and removing the bolts or clips securing it to the frame. Carefully disconnect any wiring or hoses attached to the bumper before removing it from the vehicle. Identify any trim panels or accessories that need to be removed to access the mounting points.
Use appropriate tools to carefully detach these components, taking care not to damage them in the process. With the rear bumper and trim panels removed, the vehicle is now ready for towbar installation. Take this opportunity to clean any debris or dirt from the mounting areas to ensure a secure and stable connection for the towbar.
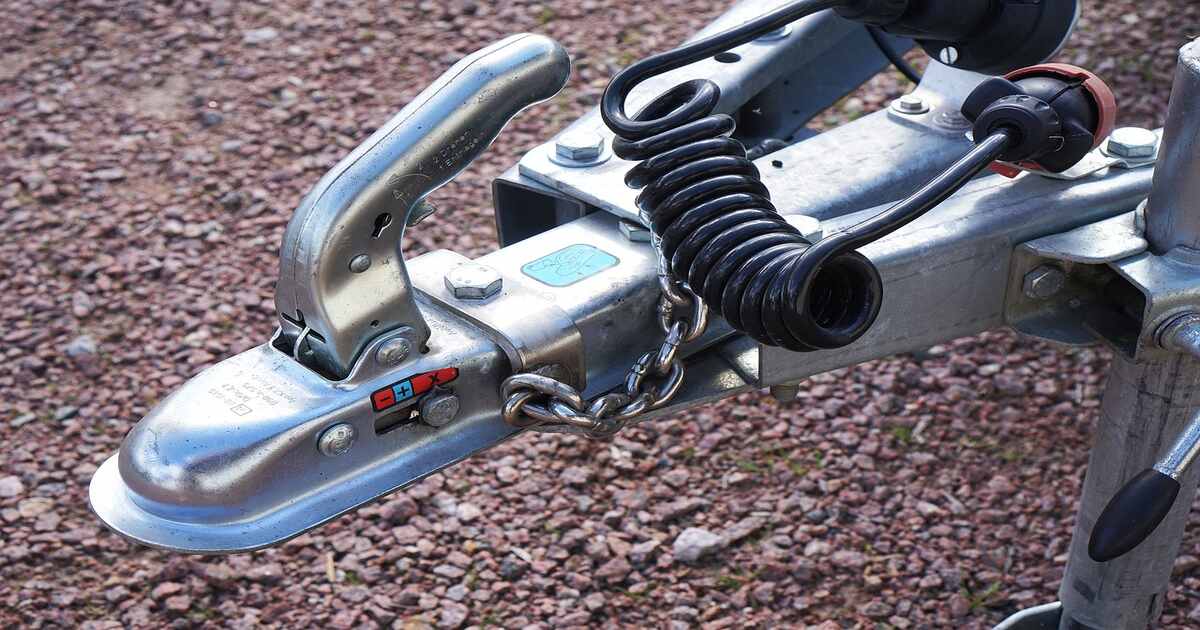
Installing the Towbar
With the vehicle prepared, it's time to install the towbar. This involves positioning and aligning the towbar, attaching it to the mounting points, and securing bolts and fasteners properly to ensure a robust and reliable connection. Carefully position the towbar beneath the vehicle, aligning it with the designated mounting points. When it comes to mounting the towbar, you can do it in 4 steps:
- Use a tape measure or alignment tool to ensure the towbar is centred and level before proceeding with the installation;
- Secure the towbar to the mounting points using the provided bolts and hardware;
- Tighten the bolts gradually and evenly to prevent misalignment or uneven stress on the mounting points;
- Ensure all bolts and fasteners are securely tightened according to the manufacturer's specifications.
Note: Use a torque wrench to achieve the recommended torque settings and prevent over-tightening, which can damage components or compromise the integrity of the installation.
Wiring the Towbar Electrics
Once the towbar is securely installed, it's time to wire the electrics to enable trailer lights, indicators, and other essential functions. This involves choosing the correct wiring kit, routing and connecting the wiring harness, and testing electrical connections for proper functionality.
So select a wiring kit compatible with your vehicle and towbar setup - this may include a universal wiring harness or a vehicle-specific wiring kit designed to seamlessly integrate with your car's electrical system. Carefully route the wiring harness from the towbar to the vehicle's rear lights, ensuring it is securely fastened and protected from damage.
Connect the harness to the corresponding wires or connectors according to the wiring diagram provided with the kit. Before reassembling the vehicle, test the electrical connections to ensure all lights and indicators are functioning correctly. This may involve using a multimeter or testing device to verify voltage and continuity across the wiring harness.
Reassembling the Rear Bumper and Trims
With the towbar installed and wiring completed, it's time to reassemble the rear bumper and trim panels for a clean and professional finish. This involves placing trims back in position, attaching the rear bumper securely, and ensuring everything fits seamlessly together. Carefully reinstall any trim panels or accessories that were removed earlier, ensuring they are aligned correctly and securely attached to the vehicle's frame or body.
Reattach the rear bumper to the vehicle, using the original bolts or clips to secure it in place. Double-check all connections and fastenings to ensure the bumper is stable and properly aligned with the body of the vehicle. Take the time to inspect the reassembled components for any gaps or misalignments, making adjustments as needed to achieve a neat and professional finish. Attention to detail at this stage will ensure your DIY towbar installation looks as good as it performs.
Testing the Towbar
With the installation complete, it's crucial to thoroughly test the towbar to ensure it meets safety standards and performs as expected. Again, inspect all aspects of the installation, including the towbar, wiring, and reassembled components, to ensure everything is securely in place and properly aligned.
Test the functionality of the towbar by connecting a trailer or testing device and operating the lights, indicators, and other essential functions. Verify that all lights illuminate correctly and respond to vehicle inputs as intended. Take the vehicle for a test drive with the towbar attached to assess its performance under real-world conditions.
Pay attention to the handling, braking, and stability when towing a load to ensure the towbar meets your expectations for fit and function. If it does not, you may need to redo the entire process or even pay for professional assistance. Keep in mind that paying for an installation is still better than potentially causing an accident.
Towbar Maintenance and Care

After you’ve installed your towbar, you can take some steps to make it last longer. To prolong the life of your towbar and ensure reliable performance, regular maintenance and care are essential. It is crucial that you periodically inspect the towbar and associated components for signs of wear, corrosion, or damage.
Pay attention to bolts, fasteners, and welds, and replace any worn or damaged parts as needed to maintain safety and performance. Keep the moving parts of the towbar clean and well-lubricated to prevent friction and corrosion. Use a suitable lubricant such as silicone spray or grease to ensure smooth operation and extend the life of mechanical components.
You should also apply a rust inhibitor or protective coating to vulnerable areas of the towbar to prevent corrosion and maintain its appearance over time. Finally, regularly inspect and touch up any areas where paint or coating has been damaged to prevent rust from spreading.
Getting a High-Quality Towbar and Its Components
Installing a towbar on your car is a rewarding DIY project that can greatly enhance your vehicle's versatility and utility. However, even if you follow this guide to the T and install your towbar perfectly, you still may have issues if you have subpar components to work with.
And that is where Perform-Ex Auto can help. We have been supplying high-quality automotive parts to Australians since 1976. Here, you can get everything you need for towing & trailers, including towbars themselves, towbar & trailer wiring and plugs, and any and all towing accessories. Simply place your order online and we will ship the goods to your address. In case you have questions, don’t hesitate to contact us, we’ll assist you in any way we can.
Leave a comment